PSA Online Appointment Requirements for First-Time Applicants
Booking your first PSA appointment can feel more complicated than it actually is, particularly when you are not sure what documents to prepare, what information to have on hand, or how the appointment system works. If this is your first time navigating the PSA appointment online process, this guide walks you through everything you need to know before, during, and after your booking, so that your first visit to a PSA CRS outlet goes smoothly and you walk out with your document in hand.
What Is the PSA Online Appointment System?
The PSA Online Appointment System is the official government portal at psa-onlineappointment.ph that allows individuals to book a scheduled visit to any PSA Civil Registration System (CRS) outlet nationwide. The system was introduced to eliminate walk-in queues, reduce waiting times, and give applicants a confirmed time slot for their transaction.
Since its implementation, walk-in visits without a prior confirmed appointment are no longer accepted at PSA CRS outlets. This policy applies to all applicants first-time or repeat. Your appointment slip with its unique QR code is your entry pass to the outlet on the day of your visit.
The good news for first-time applicants is that the booking process itself is straightforward, completely free, and accessible from any device with internet access, a phone, tablet, laptop, or desktop computer.
Who Needs to Book a PSA Appointment?
Anyone who intends to personally visit a PSA CRS outlet to request an official civil registry document needs to book an appointment first. This includes:
- Individuals requesting their own PSA birth certificate, marriage certificate, death certificate, or CENOMAR
- Parents or guardians requesting documents on behalf of minor children
- Authorized representatives requesting on behalf of a family member or authorized individual
- OFWs temporarily visiting the Philippines who need their civil registry documents
- Senior citizens, PWDs, and pregnant women priority lanes are available, but an appointment is still generally required
The appointment is required for the outlet visit. If you prefer not to visit in person, PSA appointment online ordering service delivers documents nationwide without requiring any appointment, a useful alternative when scheduling is difficult or outlet slots are unavailable.
Requirements Before Booking: What You Need to Prepare
First-time applicants often arrive at the booking form without the necessary information ready, which causes delays and sometimes form errors that require starting over. Gather the following before opening the appointment portal.
1. Your Full Legal Name
Enter your name exactly as it appears on your government-issued ID or as you believe it is registered in the civil registry. For first-time applicants who have never seen their PSA civil registry documents before, use the name on your most reliable identification: your passport if you have one, or your school records which typically reflect your legal name accurately.
If you are booking for yourself and requesting your own birth certificate, the name you enter should be your own full name, first name, middle name, and last name as legally registered.
If you are booking on behalf of a family member, the name you enter as the document owner should be that family member’s full legal name.
2. An Active Philippine Mobile Number
The appointment system sends an OTP (One-Time Password) to your mobile number to verify your identity and complete the booking. The mobile number must be:
- Currently active and able to receive SMS
- A Philippine mobile number in the format 09XXXXXXXXX (11 digits starting with 09)
- In your possession at the moment of booking you need to receive and enter the OTP while the booking session is open
If you are abroad or using an international SIM, receiving a Philippine SMS may be unreliable depending on your carrier and roaming plan. Consider using a family member’s active Philippine number if you are booking from overseas.
3. A Working Personal Email Address
Your appointment confirmation including the QR code you will need to enter the PSA outlet is sent to your registered email address. Use an email account you check regularly and have reliable access to.
Strongly recommended: Use a personal Gmail or Yahoo account rather than a school or work email address. Automated government portal emails are frequently filtered as spam by corporate and institutional email servers. If your confirmation never arrives, your most likely culprit is a spam filter on a work or school account.
After booking, immediately check your spam or junk folder if the confirmation does not appear in your main inbox within five minutes.
4. The Personal Information of the Document Owner
This is the most critical preparation step and the one most first-time applicants skip, only to encounter difficulty at the counter.
When you arrive at the PSA counter, staff will ask for the following details to search the civil registry database:
For a birth certificate request:
- Full legal name of the document owner
- Date of birth day, month, and year
- Place of birth city or municipality and province (not just the hospital name)
- Mother’s full maiden name her surname before she married
- Father’s full name
For a marriage certificate request:
- Full names of both spouses
- Date and place of marriage
For a CENOMAR request:
- Your own full name and date of birth
- Place of birth and parents’ names
For a death certificate request:
- Full name of the deceased
- Date and place of death
- Date of birth of the deceased
Verify these details against an existing document, an older PSA copy, a Philippine passport, or school records before your appointment. Do not rely on memory, particularly for parental names and exact municipal or provincial designations.
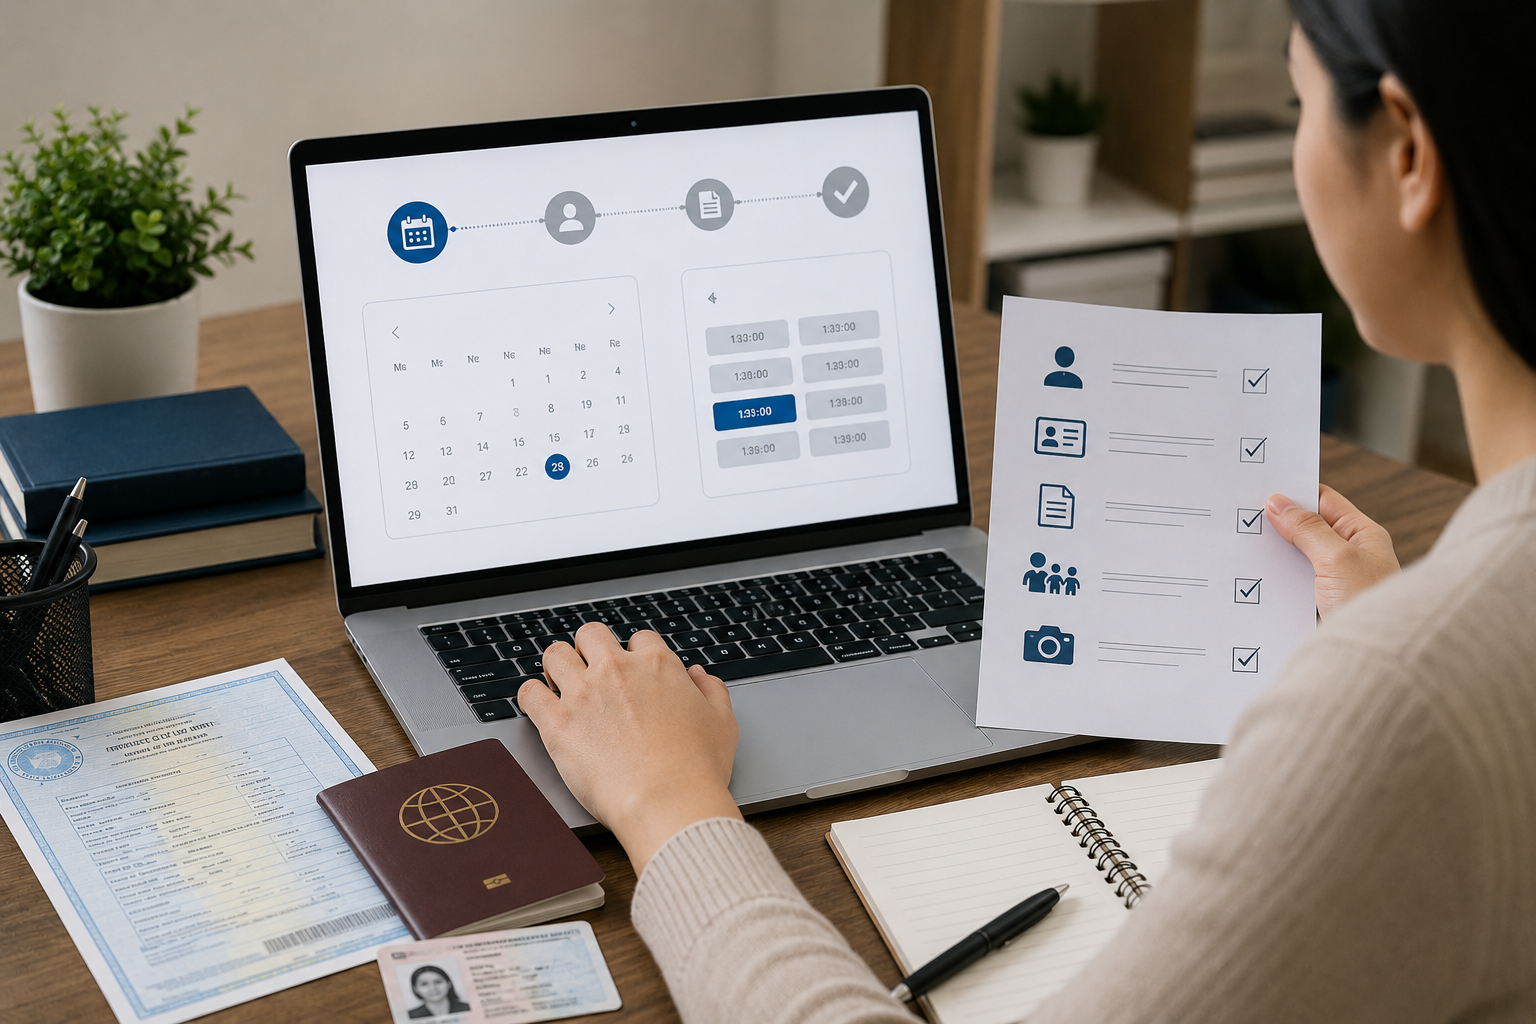
The Booking Process: Step by Step
With your information prepared, the booking process takes approximately five to ten minutes.
Step 1: Open the Official Portal
Go to psa-onlineappointment.ph in your browser. Type this URL directly, do not search for it on Google and click a result, as unofficial or outdated links may appear in search results. The official portal is free to use and does not charge any booking fee.
Step 2: Click “Book an Appointment”
Tap or click the Book an Appointment button on the homepage.
Step 3: Read and Accept the Data Privacy Notice
A data privacy notice will appear explaining how PSA collects and uses your personal information. Read it and click “I Agree” or “Accept” to proceed. This step must be completed for the booking to move forward.
Step 4: Select Your PSA Outlet
Choose the region and specific PSA CRS outlet where you want your appointment. A list of all operating PSA outlets nationwide is available in the selection dropdown.
Tips for first-time applicants selecting an outlet:
- If your nearest outlet shows no available dates, try outlets in adjacent cities availability varies significantly between locations
- Serbilis outlets located inside SM malls and Robinsons malls are widely available and typically easy to reach
- Check early in the morning for newly released slots availability is highest before 9:00 AM on weekdays
Step 5: Select Document Type
Choose the type of civil registry document you are requesting. If you need more than one document type for example, both a birth certificate and a CENOMAR you must book separate appointments for each, as each appointment slot covers one document type.
Step 6: Select Who the Document Is For
Indicate whether you are requesting for yourself or on behalf of another person.
Step 7: Choose Your Appointment Date and Time
A calendar showing available dates at your selected outlet will appear. Choose a date and then select an available time slot.
For first-time applicants: Choose a slot that gives you comfortable lead time to prepare all required documents at least one week from the booking date is recommended so you have time to gather everything without rushing.
Step 8: Fill In Your Personal Details
Enter your full name, mobile number, and email address. Double-check every field before proceeding particularly the email address and mobile number, as these are where your OTP and confirmation will be sent.
Step 9: Complete CAPTCHA and Submit
Tick the CAPTCHA verification and click Submit. An OTP will be sent to your registered mobile number almost immediately.
Step 10: Enter the OTP
Type the OTP from your SMS into the verification field and click Confirm. After a successful OTP entry, your appointment is confirmed.
Step 11: Save Your Confirmation and QR Code
Immediately after the confirmation page appears, take a screenshot of the QR code on your phone. Also check your email for the confirmation email and save it or mark it as important. Your appointment reference number and QR code are in both places.
Do not close the confirmation page before screenshotting if the page closes or refreshes before you capture it, you will need to retrieve the QR code from your email.
Documents to Bring to Your PSA Appointment
On the day of your appointment, bring the following:
For All Applicants (Requesting for Yourself)
- Your appointment slip with QR code Either the screenshot saved on your phone or a printed copy of the email attachment. If showing on your phone, maximize screen brightness before entering the outlet the QR scanner at the entrance requires a clear, bright image to read.
- One original valid government-issued ID
Accepted IDs include:
- PhilSys National ID (Phil ID)
- Philippine Passport
- LTO Driver’s License
- UMID Card (SSS or GSIS)
- Voter’s ID or Voter’s Certification with photograph
- PRC ID
- Senior Citizen ID issued by OSCA
- PWD ID issued by the NCDA
- Postal ID (newer e-Postal ID with photograph)
- IBP ID (for lawyers)
- OWWA ID (for OFWs)
- School ID with current enrollment certificate (for currently enrolled students)
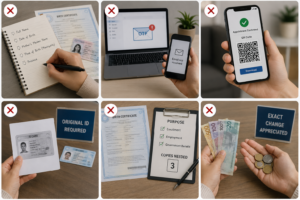
- One clear photocopy of your valid ID Some PSA outlets retain a photocopy of your ID for their records. Having a photocopy prepared avoids being asked to step aside to find a photocopying service.
- Cash for the document fee
Prepare exact cash:
- Birth Certificate: ₱155 per copy
- Marriage Certificate: ₱155 per copy
- Death Certificate: ₱155 per copy
- CENOMAR: ₱210 per copy
For Authorized Representatives (Requesting on Behalf of Someone Else)
In addition to your own valid ID and photocopy, bring:
- Authorization Letter from the document owner
The authorization letter must:
- Be addressed to you by name
- State your relationship to the document owner
- Specify the exact document type being requested
- Carry the physical signature of the document owner not just a typed name
The authorization letter does not need to be notarized for standard PSA document requests. A typed and signed letter on plain paper is sufficient.
- Photocopy of the document owner’s valid ID
Bring a clear photocopy (front and back if double-sided) of the document owner’s valid government-issued ID. This establishes the identity of the person whose document you are requesting.
What to Expect When You Arrive
Arrive at least 15 minutes before your scheduled time slot. Some PSA outlets are strict about slot timing, and arriving late particularly if the morning session is winding down may result in your slot being forfeited.
Go to the information desk or information marshal at the entrance. Present your QR code for scanning. The marshal will verify your appointment and direct you to the appropriate queue or waiting area.
Senior citizens, PWDs, and pregnant women: Inform the information marshal of your status upon arrival. You will be directed to the priority lane, which allows you to be processed ahead of the regular queue.
At the counter: The PSA staff will search the database using the personal information you provide. Have the document owner’s details ready: name, date of birth, place of birth, and parents’ names to provide quickly and accurately when asked.
If the record is found: Pay the fee and receive your document. For birth certificates and other standard civil registry documents, processing at the counter typically takes under 15 minutes once your number is called.
If the record is not found: Staff will advise on next steps this may include an alternative database search, coordination with the LCR of the birthplace, or filing a late birth registration.
Common First-Time Applicant Mistakes to Avoid
Not preparing the document owner’s details in advance. The most common reason transactions take longer than necessary at the counter is the applicant not knowing the exact date of birth, the correct spelling of the mother’s maiden name, or the specific municipality and province of birth. Verify these against an existing document not from memory.
Using a work or school email for the confirmation. Institutional email filters frequently block automated government portal emails. Use a personal Gmail or Yahoo account to ensure you receive the OTP and confirmation email reliably.
Not screenshotting the QR code immediately after booking. The QR code is in the confirmation email but if the email ends up in spam and you cannot find it on appointment day, having a screenshot in your phone gallery is your safety net.
Bringing only a photocopy of your ID. PSA requires the original physical ID not a photocopy, not a photo of the ID displayed on your phone screen. Bring the actual card.
Not knowing whether you need one copy or multiple copies. If you need your birth certificate for more than one purpose enrollment, employment, and a government benefit application, for example, request the number of copies you need at the counter. Each additional copy at a PSA CRS outlet costs ₱155 and can be processed in the same appointment. It is far more efficient to get all the copies you need in one visit than to rebook for additional copies later.
Showing up without exact change. PSA cashiers may have limited change. Prepare the exact amount in cash, or as close to it as possible.
What If You Need to Cancel or Reschedule?
If your plans change and you can no longer attend your appointment, cancel or reschedule as early as possible ideally at least 48 hours before the appointment date. This frees up your slot for other applicants who need it.
To reschedule: Open the confirmation email and click the “Reschedule” button. Select a new available date and time. A new confirmation email with an updated QR code will be sent. The original QR code is no longer valid after rescheduling.
To cancel: Open the confirmation email and click the “Cancel Appointment” link. Confirm the cancellation.
Frequently Asked Questions for First-Time Applicants
Is there a fee for booking a PSA appointment?
You pay only the document fee ₱155 or ₱210 when you arrive at the PSA outlet. Any website that charges a booking fee for a PSA appointment is unauthorized.
How far in advance should I book my PSA appointment?
Book at least one to two weeks in advance, particularly for outlets in Metro Manila where slots fill up quickly. During the April to June enrollment season, book even earlier three to four weeks ahead as demand surges significantly during this period.
Can I book for multiple family members in the same appointment?
No. Each appointment covers one person’s document request. To obtain documents for multiple family members, book separate appointments for each. You may, however, request multiple copies of the same person’s document within a single appointment.
What if I arrive at the outlet and cannot find my QR code?
Go directly to the information marshal and explain the situation before joining any queue. Provide your full name, registered mobile number, and approximate booking date. Staff may be able to manually verify your appointment. If manual verification is not possible, you may need to rebook. Always screenshot your QR code immediately after booking to prevent this situation.
Can I book a PSA appointment even if I am not sure my record is in the PSA database? Yes. You can book an appointment and have PSA staff search the database on the day. If no record is found, the staff will advise you on next steps coordinating with the LCR of your birthplace or filing a late birth registration if needed. There is no penalty for booking when the record turns out not to be in the system.
Final Thoughts
Your first PSA appointment does not have to be stressful. The booking process is simple, the requirements are manageable, and the transaction at the counter typically takes under 30 minutes from arrival to document receipt provided your record is in the database and your documents are complete. The difference between a smooth first experience and a frustrating one comes down almost entirely to preparation: knowing the document owner’s exact personal details, using a personal email address for the booking, screenshotting the QR code immediately after confirmation, and arriving 15 minutes early with your original ID, the correct cash amount, and any authorization documents ready. Follow these steps, and your first PSA appointment will be exactly what it is designed to be: a quick, efficient, same-day service that puts an official civil registry document in your hands before lunch.